Blog | Tag: reviews
December 11, 2014
ThingLink has EXPLODED in my Classroom!
I’ve really taken to ThingLink this school year in my classroom. I had tried it before, but I really found value in using ThingLink now that I’m back with students as a way to provide them a lot of independence to explore some hand-picked resources. I’d create the images and link up starter resources and tools to send students in the right direction to get them asking even more questions.
Last quarter I set up a ThingLink to share with my Digital Learning students a recent news story involving a copyright dispute over some monkey selfies. (You can see how this topic really hit home with kids and piqued their interest!) (more…)
Posted in created by mrs. k, reviews, student examples, web 2.0 tools | By Mrs. K
February 4, 2014
Creative Commons Search: Find Content You Can Share, Use and Remix
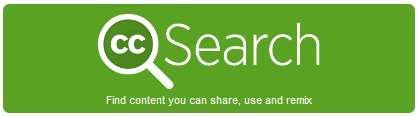 |
| Image from CreativeCommons.org |
When students need multimedia like images to use in their projects, I cringe at how quickly (and without a second thought) they do a Google Image search and pop the first thing they find right into their project and move on. While teaching students (and adults!) the importance of respecting copyright and attribution isn’t a new thing, it certainly has become more of a challenge in a world where we’re inundated with multimedia being shared all over the internet all the time, and the internet is such an integral part of our everyday routines.
Here’s where Creative Commons comes in. Authors can choose to publish their work under a Creative Commons license to adjust copyright stipulations, which may allow the work to be shared, used, or remixed by others. From the Creative Commons website: (more…)
Posted in reviews, web 2.0 tools | By Mrs. K
December 17, 2013
Drop Everything and go check out Blendspace
I mean it. Drop whatever you’re doing and go check out Blendspace.com right now. (Formerly known as EdCanvas, so don’t be confused if you see EdCanvas branding in the videos!)
Blendspace is a free web tool for teachers to collect resources in one place to form a bundled, interactive lesson for students or colleagues. When you create a Blendspace lesson, you can pull in videos from YouTube, websites, pictures, EduCreations lessons (check out my previous post about EduCreations for more info on that!) Flickr images, or links and images from Google. You can import from Gooru, OpenEd, Dropbox, or Google Drive. AND you can always upload your own files, like PowerPoints or resources housed on your own computer. Pretty much any resource you can imagine or that you would pull together to share can be embedded into a Blendspace lesson. But that’s not all! (Note: video above is a quick overview!) (more…)
Posted in BYOD, reviews, web 2.0 tools | By Mrs. K
December 12, 2013
LearnZillion Can Help Keep Students on Track Over Winter Break
 |
| LearnZillion.com |
You all know how much I love LearnZillion. Its (free!) database of Common Core aligned video lessons for ELA and Math grades 2-12 are outstanding, especially when teachers take advantage of LearnZillion’s features to assign and monitor student progress through targeted lessons that support differentiation.
I got an email from LearnZillion this week with some tips and tricks on how its service can help keep kids on track during the holiday break, and the ideas are too good not to share again, especially with the upcoming break almost upon us.
First, if you’re not already using the Assign function in LearnZillion to assign video lessons to your students, I highly recommend doing so! It only takes a few minutes to add your classes/students. Then you can assign targeted video lessons to specific students based on their individual needs, whether they need reinforcement or a challenge on a particular concept. If you want to see how quickly you can add students (really!), check out my LearnZillion Video Tour starting around the 2:13 mark. Then watch this quick tutorial on assigning lessons from LearnZillion.
Prevent Winter Break Brain Drain!
Tips and tricks from LearnZillion
ELA: Assign one fiction and one non-fiction reading set for winter break, or create a list of possible reading lesson sets with a minimum of one from each genre so students can choose. Always give students the option to do more if they want!
Math: Let students preview what’s coming in the new year by assigning lesson sets for standards you’ll be teaching in January. If a student needs targeted help, assign him or her a lesson or lesson set from the standard they’re working toward.
While students may be sliding down snow-covered hills over winter break, at least you’ll be confident knowing they won’t also be sliding in reading and math, thanks to these tips straight from LearnZillion.com.
Looking for more ideas on how to use this tool effectively? I love the LearnZillion Blog, where the Dream Team posts tips and tricks like these all the time. For example, the most recent post, Three Tips for Approaching Close Reading, is excellent!
Happy holidays! See you in 2014.
Posted in reviews, web 2.0 tools | By Mrs. K
December 10, 2013
Padlet in the Classroom

I’m always looking for cool tools that can serve lots of purposes in the classroom. Tools that make life easier for teachers AND are more engaging for students in meaningful, educational ways are sure winners, and Padlet is currently one of my favorites. It’s a great tool for formative assessment that also doubles as a collaborative way for students (or teachers) to connect with each other, too! Students collaborate on a shared wall space and YOU get all of the evidence you need to see if students “get it” or not. It’s pretty magical!
Padlet.com is a free web 2.0 tool for teachers. With an account, a teacher can create unlimited shared wall spaces that are great for collaboration between students or colleagues. Create a wall and share it with students; they don’t need to have an account to collaborate on the wall.
When you make a Padlet wall, you as the owner have control over how it looks and functions. Set the background, give it a title and description (the perfect space for instructions) and even give it a personalized URL. All walls have their own unique URL, which is how you share it with others.You can even password protect your wall, so you’ll be confident linking to your collaborative wall on your classroom webpage for students; just be sure they know the password to access the wall. And because it’s web-based, this means it can be accessed from anywhere with internet access. (A great tool for flipped classroom setups.)

To add to the wall, simply double click (or double tap, as it works perfectly in the browser of any personal device, too!) and you’ll create a new post-it note. You’re able to add a heading or title to your note (a great place for students to type their names to help distinguish and identify their notes from others) and text in the body of the note. Notes are re-sizable and the owner of a note can move it around on the wall. The best part? You’re not limited to just text on a note; you can also attach other things to your notes: add a URL to other websites or videos, upload a file (hello, assignment turn-in!) or take a photo using your computer’s webcam.

I love using Padlet for exit slips. For example, I presented BYOD to our secondary admin at a meeting. At the end, I directed them to a Padlet wall I had created where I wanted them to add a note and tell me what kind of support they wanted for their building, so that I knew how to follow up with them and set up future trainings. Of course, with the nature of posting “notes” to a wall, the notes were all over the wall in no particular order by the end. This is the beauty of Padlet – I collected the data from “students” and then as the owner of the wall, I can go back to it later and rearrange the notes in a meaningful way for ME so that I can analyze the data. I arranged the notes by building so that I could see what each building’s needs were, and then I added a note myself underneath each building’s cluster of notes to remind myself how and when I contacted those admin to arrange the follow up supports they wanted. Even 3 months later, I can go back and tell you on what date and how I followed up with those administrators.
For a practical classroom example, let’s say you asked your kindergarten class to add a post-it to your wall with a word that has a long “A” sound in it. Whether students are 1:1, BYOD, or you have a “station” with the wall up on a classroom computer and students rotate through and add a post-it sometime during the day, at the end of the day YOU have a wall of notes, one per student, and now you can arrange the notes in a meaningful way to analyze who gets it and who doesn’t. Over here are all the kids who got it, over here are all the ones who didn’t. Now you know who needs more work with the long “A” sound. Change up the question depending on the topic, grade level, etc.

This tool isn’t just for students: you can use Padlet to collaborate with your colleagues or collect resources and images for an upcoming project with your department or grade level team all in one place together.
I worked with a secondary art teacher who wanted to take her class on a walking field trip through the building with their devices. Students were to use their device to take pictures of various elements of art that they had been learning about – texture, space, line, etc. Her dilemma was then how to have all of those images shared back with her so she knew if they understood the concepts or not. Solution? She created a Padlet wall and shared it with the class. When students were done with the activity, they were able to access the wall right in the browser of their devices, and using the Upload File option, attach pictures right from their camera rolls onto their post-it. So Joe adds a note with his name on it and types, “This is my example of texture” and attaches the picture he took representing texture to the note. Bam. All students do it, and now all students can see each others’ photos and more importantly, the teacher can tell who gets it and who doesn’t. Or perhaps students can analyze the results and weigh in on whether or not they make sense. All in one place.

Padlet is great for “parking lot” or “check in to check out” activities. Imagine a gym class where the teacher asks students to share how they beat their personal best this week, or a music class where students add a post-it to the wall to share what imagery came to mind as they listened to a specific piece of music.
Students can cite evidence from text in a close reading activity using a Padlet wall. I worked with a teacher who asked students whether they had free speech or not. After accessing various articles on what free speech is, students were then asked to support their opinion on the Padlet wall, citing evidence from the text that they read. This kind of activity spans all grade levels; citing evidence and supporting your opinion is a key skill at any age.

What about a KWL chart? By using a different background on your Padlet wall, (or uploading your own) and adding headings yourself ahead of time to define the K-W-L spaces on the wall, students can then add post-its and place them under the proper category to share what they Know, what they Want to know, or what they Learned. And speaking of using Padlet to categorize notes, you could also use it as a space to collaborate on a schedule or have students organize their responses in a certain way. It’s important to note that the teacher is the only one with a Padlet account; and the owner of the account/wall is the only one who has control to move ALL of the notes around. Students connected to the wall can only modify, edit, or move THEIR own notes around, but not the notes put up by others. Keeping Padlet’s Terms of Use in mind, accounts can only be created by those 13 and older, so in the elementary realm this would be the teacher only, but secondary students could make their own Padlet accounts and set up their own walls so that they have a collaborative space to work with peers on group projects. (To achieve a collaborative space for group projects in the elementary, the teacher could make all of the walls and share the different wall URLs with teammates.) Speaking of TOU, don’t forget that teachers of students under 13 should notify parents and seek permission for students to use the service to post notes on your wall(s) before continuing. You can access that information here: Padlet’s Terms of Service

Here’s another cool idea – you as the teacher set up a wall and link to a video news article online. Your instructions are for students to watch the video, and then post a note in response to the video on the wall. What I love is that you achieve this by inserting the URL to a YouTube video, for example, and students can watch the video embedded right on the wall instead of clicking off to another page or window. Then they can post their response right away, next to the video clip. This also works by linking to a specific news article or website; students access the link to the article or website and read it, then come back to the wall and post in response to a question you pose about what they read.

Another unique way to use a Padlet wall is as a communication tool for parents and students on your classroom webpage. Think of it as a forum; set up your Padlet wall so that notes post in a column layout, (this means anytime someone adds a post-it note, it goes in a column stream on the wall instead of anywhere randomly on the page) and you’ll be able to see the latest notes posted at the bottom. Students could post a note ask for homework help, and anyone from class – you or another classmate – can add a note to respond and help. You can also share information with parents by posting a note, and attach any relevant files, images, or URLs they may need. This turns the Padlet wall into a stream of interactive conversation. If you password protect your wall, it only becomes accessible to your students and parents. (Just don’t forget to share the password with them!)

Whew! There are tons of ways that Padlet could be used effectively in the educational space, and the list keeps growing. Padlet even has a gallery of ways people use it that you can check out. How would YOU use Padlet in the classroom? Contribute your ideas to this public Padlet wall!
Posted in reviews, tutorials, web 2.0 tools | By Mrs. K
November 25, 2013
Using PollEverywhere.com for Formative Assessment

I enjoy opening a PD session with a quick poll that I made at PollEverywhere.com. I often use polls as an anticipatory guide to let me gauge where my audience is before we start, or to get them excited and thinking about the upcoming lesson. The quick data that I can collect with an interactive poll helps me adjust my teaching to fit my audience’s needs.
For example, if I’m holding a training session on Google Docs, I may have a poll up as people are arriving to ask them their comfort level with Google Docs at that moment, before the training. I can look at the results quickly before I start and tune my training accordingly based on the data; if most people have zero experience with Google Docs, I would teach differently than I would if I had a large group of people with experience. And if I have some that identify as intermediate or expert, I have some more challenging “take it to the next level” activities in my back pocket for them. Though this data is anonymous and depicts the group as a whole, it still helps me differentiate and support the full spectrum of needs thanks to a quick poll with instant, live results I can use right away.
PollEverywhere is a great formative assessment tool.You can sign up for a free account at PollEverywhere.com. There is the option to upgrade to a paid, premium account (which gives you the ability to enable student registration and grading), but I’m happy with the capabilities of the free account for my needs. Remember – I am just looking for quick, instant feedback to help drive my next lesson or gauge my audience on the fly.
There are two types of questions that you can create: multiple choice or open-ended.
Multiple Choice Poll Questions

When creating a multiple choice question in PollEverywhere, you can give options as text or use images to represent poll choices instead. I love using images as poll options for the primary grades! Multiple choice questions give you the ability to find out if students know or remember something you’ve previously shared. You can start the day with a multiple choice poll to see if students remember the take-away from the previous day’s lesson. You could also ask students a question to gauge their understanding before beginning a new lesson to see how many may already know the answer. I also like using multiple choice poll questions as a “digital fist to five” as I mentioned previously, where students can tell me on a scale what their comfort level or understanding is before or after a lesson.

I also like asking a question at the start of a lesson, and then asking the same question (in a separate poll) at the end of a lesson, to see how responses may have changed after gaining new knowledge during the lesson, or to show student growth as a result of the lesson. As a real life example, students in a 4th grade classroom were asked at the start of a lesson whether or not they had free speech as a student. Their options were Yes or No. We displayed the results to show them what everyone thought before the lesson. Then we did a variety of close reading activities and had curated some interesting age-appropriate articles that students read and jigsawed collaboratively, and at the end of the lesson, we posed the same question – do you have free speech as a student? Based on the resources they’d read to learn more about what free speech is and real life examples that they could relate to, they voted again, Yes or No. Because we did this in two separate polls using the same question, we were able to analyze the before and after results. Imagine how powerful this could be! It’s one thing to ask kids to raise their hand or do a thumbs-up, thumbs-down, but when you record results in a poll, you can take the responses to the next level and let the students analyze the visual results, too.
 |
| Analyzing results: Before (left) and After (right) |
Open-Ended Poll Questions

Open-ended polls let you ask an open-ended question that could require a phrase or varied response as opposed to a set multiple choice answer. For example I could ask, “What is one thing you already know about volcanoes?” and students could share their varying responses similar to how you might use a traditional KWL chart. (Of course I could then follow up with an open-ended poll question to ask what they want to know, and later on to have students tell me at least one thing they learned, too!)

A real life example of using an open-ended poll question involves asking students to use the first word that comes to mind to describe a character in a book you’ve just read, or one you’re currently reading. If I asked 2nd graders to describe Amelia Bedelia as an open-ended poll and chose the output method to be word cloud, then their results would appear on screen in a word cloud, meaning words that are used by lots of students will be larger so you can see the words that were used the most often to describe the character. To make this more meaningful at higher levels, if the character in a book goes through some significant character development during the story, you may want to pause and do this activity in the beginning, and then again at the end, to see how the word clouds for the characters have changed.

Supporting BYOD and Technology Integration
PollEverywhere.com is a web-based tool that can be used to support BYOD (Bring Your Own Device) models or 1:1. You’re not limited to just texting in a response to a poll, though that is certainly an option I’ve used with adults before, but responders can use the web response form (located at http://pollev.com) in the browser of any device – laptop, smartphone, tablet, desktop computer, etc. – to answer poll questions. In the free speech example above, students in the classroom had a combination of laptops they borrowed from the school and their own devices that they brought in. I LOVE browser based tools that support technology integration regardless of tech model. If you have a limited number of devices to use, you can always have students group up and collaborate on the question, coming to a consensus and then voting as a group. You could also use the device as a “station” – by refreshing the web response page at pollev.com after submitting your response, you’re free to submit another response. So one student could respond, hit refresh, and another student could then respond as well.
The possibilities seem endless, and it’s such a quick way to gather informal data that you can turn around and act upon immediately. Head on over to PollEverywhere.com and make an account today!
Posted in reviews, tutorials, web 2.0 tools | By Mrs. K


CAM Technology Coordinator
CAM Tech Department Team Leader
CAM Webmaster